If you buy via a link on this page, we may receive a commission, at no extra cost to you.Learn more
All anglers must know how to take care of their equipment. How to clean their rods, thread lures or hooks, know how to tie a proper knot, and how to put a line on a spinning reel without twists are all basic skills that any angler should have. Sure, most times, when you purchase a brand-new rod and reel combo, the store often offers to spool the line. But what happens when you need to replace the line? Will you get back to the store and pay them to put it on? Of course not!
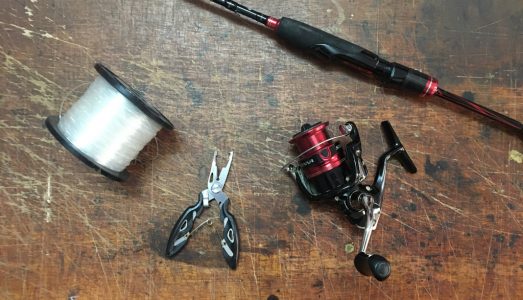
Don’t worry; the process might look a little tricky. But it is like riding a bicycle. Once you’ve learned it, you will never forget it. Here we present to you an effective approach on how to put line on a spinning reel correctly. The first thing you should do is to get all your equipment. Then:
- Place the reel in the seat
- Check how your reel spools the line: Clock or counterclockwise
- Place the spool in a matter that the line comes off in the opposite way than the reel put it on. In other words, if the reel spools the line clockwise, you should place the spool so that the line comes off in a counterclockwise fashion
- Pass the line through the ring closest to the reel seat (the largest one)
- Open the bail wire (This step is VERY important)
- Fix the line to the spool with a knot. We recommend using an arbor knot
- Close the bail (Again, this is quite crucial)
- Now, grab the line with your thumb and index finger. Make sure the line is tight and that you apply enough pressure
- Gently crank the handle while making sure that the line is wrapping evenly
- After 20 to 30 spins, check that the line doesn’t twist as you cease the pressure. If so, you might want to start over
- Leave 1/8 in free
- Check whether or not the line is firmly wrapped around the spool before cutting the line
- Cut the line and fix your terminal tackle
It might look like a long process, but we can assure you that it is not. Besides, the first few steps, as well as the last two, are more like preliminary and checking steps. Bear with us a little longer if you want a deeper understanding of each step and why they are important.
How to put line on a spinning reel for beginners
Although this is a valuable skill for both season and beginners alike, it is quite likely that you don’t know how to do it. But don’t despair as we will show you the process.
Gather all the necessary gear
Take the line, rod, reel, and a pair of scissors or clippers. Some people also recommend a clean piece of cloth and silicone spray. If you don’t have one, don’t worry. It is not necessary.
Place the reel in the seat
It will be a lot easier to put the line in the spinning reel if it is already on the rod. There is no need to assemble all the sections if you have a breakable pole. You just need to have at least one line guide.
Check on which direction the spool winds the line:
The easiest way to do it is to place a finger in the spool and crank the handle. To avoid confusion, do this as if you were using the rod for real.
Place the spool so that the line comes off in the opposite direction of step 3:
As simple as that. If the reel winds the line in a clockwise fashion, then the line must come off the coil in a counterclockwise matter. The reason is that this will tame most of the line twist. This is especially true for monofilament lines.
Many people argue about these directions. For instance, some anglers say that both the line spool and the reel must go in the same direction. Still, we prefer our way, since most pro anglers, like Mike Iaconelli, do it as described here.
Pass the line through the guide closest to the seat:
You might notice that not all anglers do it this way, but it will make things easier for you. First, the line will come as straight as physically possible. Plus, you will be able to control it better this way.
Besides, as you need to place the spool line directly beneath the winding line, passing it through the guide will be extremely helpful. Some anglers use all the line guides for this, while others use none of them.
Open the bail wire:
If you need to open the bail before you cast, it makes total sense to open it before winding the line. You won’t be able to do it otherwise.
Tie the line to the spool:
There are many ways you can do this. The first and most reliable is to use a knot. We strongly suggest going with an arbor knot. Here you have the step-by-step process:
- Wrap the line around the spool. Make sure to pass enough standing line.
- Make an overhand knot around the main line with the standing line.
- Make another overhand knot with the rest of the standing line.
- Tight each loop and then squeeze the first loop as close to the spool as possible.
Get it? If not, don’t worry, here you have an instructive video on how to tie an arbor knot.
No, before you are, an arbor knot is not the only way to fix the line to the spool. You can merely use a double overhand knot, hangman’s knot, or other similar knots. But we like the arbor knot better since it is simpler and more reliable.
Some anglers use electric tape instead. We don’t recommend this, though. You must make sure that the line doesn’t come off the spool, and we believe that a proper knot is the best way to achieve this.
Close the bail:
After you’ve secured the line to the spool, make sure to close the bail as its main job is to distribute the line evenly.
Take the line between your thumb and index finger:
The last thing before starting to spin the reel is to grab the line between your thumb and index finger. Make sure that the line is tight during its way to the spool. Apply enough pressure to keep the line from twisting.
Here is where some people use a clean piece of cloth and silicone spray. They apply the spray to the cloth and then grab the line with it. By doing this, you will avoid the line from burning your fingers. Still, this is not mandatory.
Start cranking the handle:
It is important to wind the line slow enough for you to control it. But fast enough, so it doesn’t tangle. Keep this speed, if possible, and make sure that the bail is doing its job.
Check the spool and line before 20 to 30 spins:
Make sure that the line is evenly distributed around the spool. Cease the pressure and check if the line twists or tangles; you want to avoid this at all costs. Lastly, check how tight the line is around the spool.
Start winding again as soon as you finish the inspection. Repeat this process from time to time.
Keep wrapping but don’t fully spool the reel
Make sure to leave 1/8 in of the spool free of line. This will prevent the line from getting out of it; thereby, preventing bird nests.
Last inspection
Once you are finished with the line, make sure to check everything again. That is, checking if the line is tight in the spool or if it gets tangled as you stop the pressure. Cut the line with a pair of scissors or clippers if everything is looking ok.
Now, all that is left is to fix your lure/hook and terminal tackle, and that’s it.
Another useful advice is to keep the line tight at all times. For example, while you are not using the rod, make sure to hook the lure to one of the line guides. Then, tight the line with a slight twist of the handle. This will prevent the line from getting out of the spool.
How to put braided line on a spinning reel

The exact same process works with all fishing line types. Therefore, you can use this guide if you are planning to spool some braided line into your spinning reel. Keep in mind one thing, though. Some spinning lines aren’t braid-ready. Hence, you will need to spool some monofilament as backing. Still, the process is the same. The only difference is that you will be using two lines instead of one.
We recommend either using a blood knot or double uni knot to secure both lines together.
How often should I replace my fishing line?
Sadly, there is no exact answer to this question. A wide variety of factors affect the line’s life. For example, constant exposure to the sun will degrade the line faster, as well as continuous periods of strain. So, make sure to check your line for any signs of abrasion or peeled areas. If you see any, the best thing that you can do is to discard the section or re-spool the reel.
Keep in mind that monofilament lines aren’t as resistant as braid ones. Thus, you might need to replace them more often.
What is a spooler machine?
Some brands create these amazing gadgets called spooler machines. These fellas will help you to put a line into your spinning reel without breaking a sweat. And the best thing is that you don’t need to ask anyone to help you. Plus, they are quite affordable. You would be glad to have one around, especially if you fish regularly.
Now, it is time to cast!
As you can see, wrapping your reel with a new fishing line is not difficult at all. It takes a little practice and time at first. But once you get a grasp of the technique, you will be doing it with your eyes closed.
There are a couple of things to remember, though. First, open the bail before anything else. Then, tie the line to the spinning reel with an arbor knot, preferable. Next, hold the line tight with your thumb and index fingers, and start spinning the handle! Make sure that the line is coming off the spool line in the opposite way than the reel takes it on. This is essential to prevent the line from getting tangled.
Lastly, remember not to spool the reel to its limits. Always leave 1/8 in so it doesn’t come off, and you are good to go!
If you are having some trouble with the technique, make sure to check this video.