If you buy via a link on this page, we may receive a commission, at no extra cost to you.Learn more
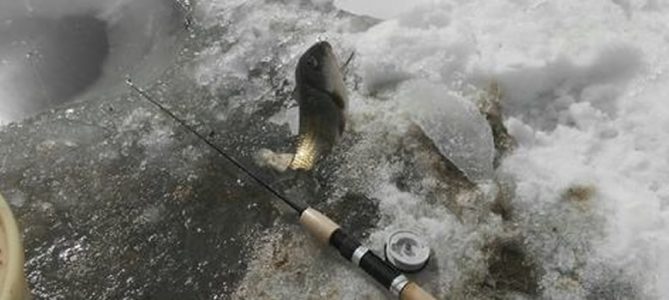
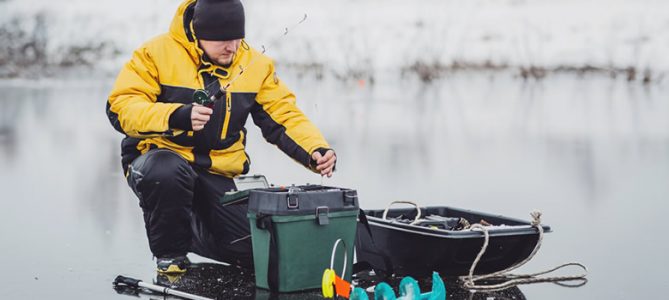
All anglers agree that carrying your gear from your car to the ice and back is the worst part of any fishing trip. Thankfully, anglers invented ice fishing sleds as an answer. However, we still need to drag out gear; which depending on the weight, could be time and energy-consuming.
But there is an answer to this dilemma as well: Skis! Today we are going to dedicate ourselves to learning how to build a Smitty ice fishing sled. Before we begin, make sure to have the following materials at hand.
- Ice fishing sled
- Set of skis
- Four 2×4 wood studs
- Two 1×4 planks
- Screws
- Hand saw
- Screwdriver
- Drill
- Masking tape
- Counter sink
Now that you have everything, we can start our DIY project! Let’s get down to it.
What is a Smitty sled?
A Smitty Sled is a type of ice fishing sled designed for hauling gear and equipment out onto the ice. It is typically made of a wooden or plastic base, with a frame made of PVC pipes or metal tubing.
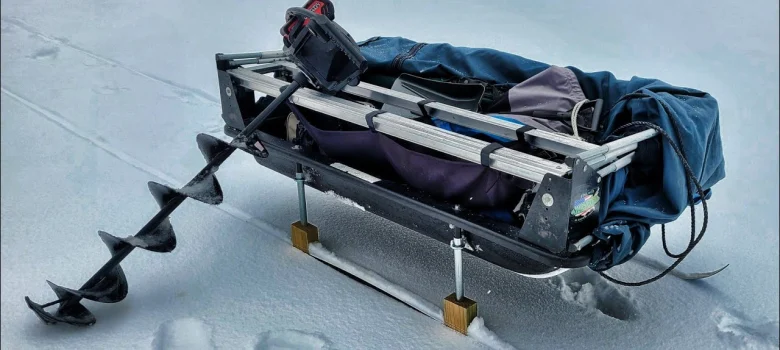
Some Smitty Sleds may have additional features such as rod holders, storage compartments, or even small shelters attached to them. They are often used by anglers to transport fishing gear, bait, and other equipment to and from their fishing spot on the ice, and to provide a platform to fish from while on the ice.
Finding the Right Ice Fishing Sled
Every journey has to start somewhere. For us, it starts here, finding the right ice fishing sled. There are no rules written in stone. The decision comes down to personal preference, budget, and availability.
We are not going to talk about all the different models and their characteristics. But don’t worry. We are not about to leave you hanging either.
We’ve already covered 10 of the best ice fishing sleds you can find today. There you will also find all the relevant information you need to make an educated decision on your purchase.
Finding the ice fishing sled first is crucial, as all the rest of the materials depend on the dimensions of the sled.
What Skis for a Smitty Ice Fishing Sled
The set of skis is the most important thing before the sled itself. There are several models available. Each with different width and length. However, we recommend going for downhill or cross-country skis. These are the most commonly used to make a Smitty ice fishing sled.
Now, there is no need to get a brand new pair if you have a set of skis lying around in your house. Similarly, we encourage anglers to get a second-hand set. You will have a couple of Benjamins in the process.
Regardless of what you end up getting, we recommend the skis be slightly longer than the sled. Around 10 to 20 inches will be sufficient. Plus, make sure the tips are nicely curved up. This will keep the sled from burying itself in the snow as you pull it.
Building a Smitty Ice Fishing Sled: Step-By-Step Process
It is time to get on the fun part. Before we begin our DIY project, we recommend placing everything on the ground. This way, you don’t need to go looking for the next piece of your puzzle.
Ski Placement
The first thing you must do is align the skis and the sled. This way, you can guarantee that the holes will be in the correct place. Do as follows:
- Place the sled on top of the skis. Leave more clearance on the front and a few inches on the back. It will be easier to pull the sled this way, particularly if it is fully loaded. Mark the skis once you find the correct placement.
- Finding the right span between each ski is tricker. Sadly, it is arguably the most crucial step. For example, if there is not enough distance between each ski, the sled will become unstable. You won’t be able to pull the sled with a snow vehicle as a result. Ideally, the center of the ski should be aligned with the edge of the sled. In other words, half of the ski should be inside the sled and the other half outside. If this is not possible, either because the edge is too flimsy, then try to place the skis as close to the edge as possible. Mark the ski once again.
Remove Bindings
Most skis come with bindings, especially new ones. Consequently, we need to take these out. We want our skis bare, to ensure that the rails and the skis hold together better.
Build the Structure
This step is optional. You can very well fix the skis directly onto the bottom of the sled. However, we don’t recommend it, as it will be harder to pull and less stable. We suggest making two rails.
The first step is to cut the 1×4 planks. Both should be long enough to cover the sled with. Now, it is time to make the base of the rail. Grab two 2×4 studs and cut them. You can go for a rectangle or angled cut. The second looks better and usually yields more stability. But it takes more time and skill.
For an angled cut, the base should be around 6 to 8 inches, and the slim-down width of the 1×4.
Use two or three 2-inch wooden screws to bind each stud to the plank. Rinse and repeat with the other rail.
Bind the Skis to the Rail
Getting this step right is critical. Failure to do so might cause irreparable damage to the skis. So, make sure to have enough time and space to make this right.
First, place both skis on the flat on the ground. Put the rails on the skis. Use the markings you made before as a reference. Move the rails as necessary to ensure the base is in the center of each ski. This way, you can ensure that half of the ski is outside the sled and the other half inside. As we discussed earlier today, this is the most stable setting for your ice fishing sled.
Mark the position of the stud using tape. Drill two holes in each one of the markings that you made with the tape. Make sure that they are in the middle. We recommend using a pencil and ruler to point it out.
Use the counter sink on the bottom of the holes. This way, the screw head won’t protrude out of the ski. Many people skip this step because they think that it is not a big deal. But it is. If the head is not flush with the bottom, it will create drag or could get snagged.
For the next step, we suggest laying the rails upside down. Align the skis with the rails, and fasten the skis with screws.
Now Bind the Sled to the Rails
We are halfway there. It is time to attach the sled to the rail. You can either use screws or bolts. We prefer and recommend the latter. You only need to drill two holes through the sled and the rail and bind them together using bolts.
You can also use only one bolt. But we highly suggest using at least two. Tension distribution will be better, and the connection between the sled and the rail will be stronger.
Now you have the whole system ready to roll. However, depending on the sled you are using it may not have a rope. If this is your case, we suggest attaching one now.
Some people attach a rope to the sled, and others to the skis. The choice is yours. In our opinion, if you are transporting heavy loads, it is better to attach the rope to the tip of the skis. This way, the skis won’t get buried in soft snow. Plus, it requires less effort as well.
The process to attach a rope is the same whether you do it on the skis or the sled. Just drill a hole large enough for a thick rope to pass through. Secure the rope with double overhand knots. Alternatively, you can attach the rope to a carabiner and then buckle it to the sled or ski.
Making Your Smitty Ice Fishing Sled: Final Thoughts
Using a regular ice fishing sled is a fast and easy way to transport your gear through the ice. But you can make your life even easier by turning it into a Smitty ice fishing sled. You just need to add a set of skis, and you are ready to roll. In this case, glide.
The process is simple. But you need some materials like two 2×4 studs, two 1×4 planks, an ice fishing sled, a set of skis, screws, bolts, a saw, a screwdriver, and rope.
It is crucial to align the skis in such a way that the tips protrude in front while also leaving a few inches in the back. This will ensure a smooth glide through the snow. We also recommend using the rails we mentioned earlier as this will place your sled higher, making it easier to tow.